POE409 - Quick Start Guide
|
User Information •The POE409 must be installed in a clean, dry environment where it will not be exposed to high temperatures, moisture or excessive dust. •Do not touch the POE409 or any of its connections with wet hands.
|
•There are no user serviceable parts in the POE409 and opening or attempting to repair the product will void the warranty.
•Do not install or use the device if the CAT5e/CAT6 Ethernet Cables connected are damaged.
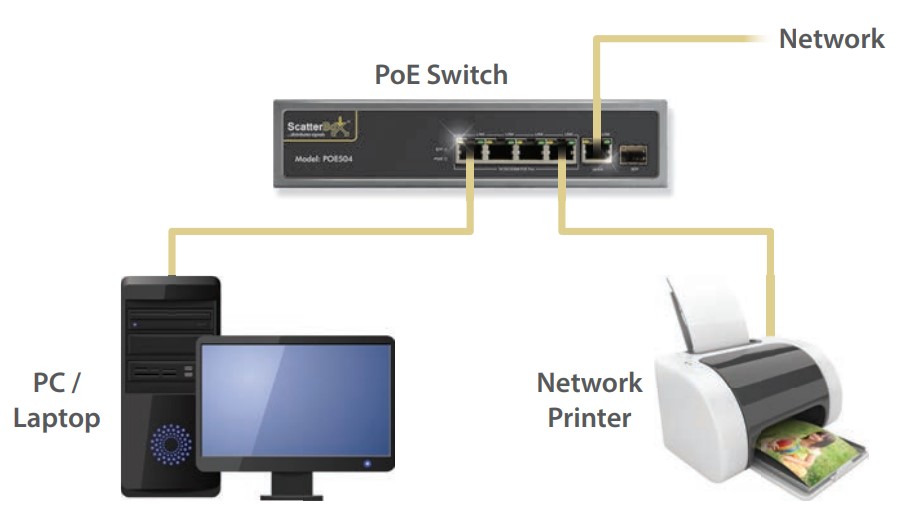
The PoE switch will detect whether the load device is PoE compatible and provide PoE power automatically and network connection.
The units add extra flexibility to a network infrastructure thanks to 100 metre run capabilities both in and out.
The Switches have different uses and setup options. Including providing power to PoE Cameras, and providing network access to devices like computers. |
|
Setup Options
Option 1 To power IP Cameras using the PoE switch then connect the IP Cameras using CAT5e/CAT6 Ethernet Cable, for longer distances we recommend using high quality cable, with solid copper cores. cores. |
|
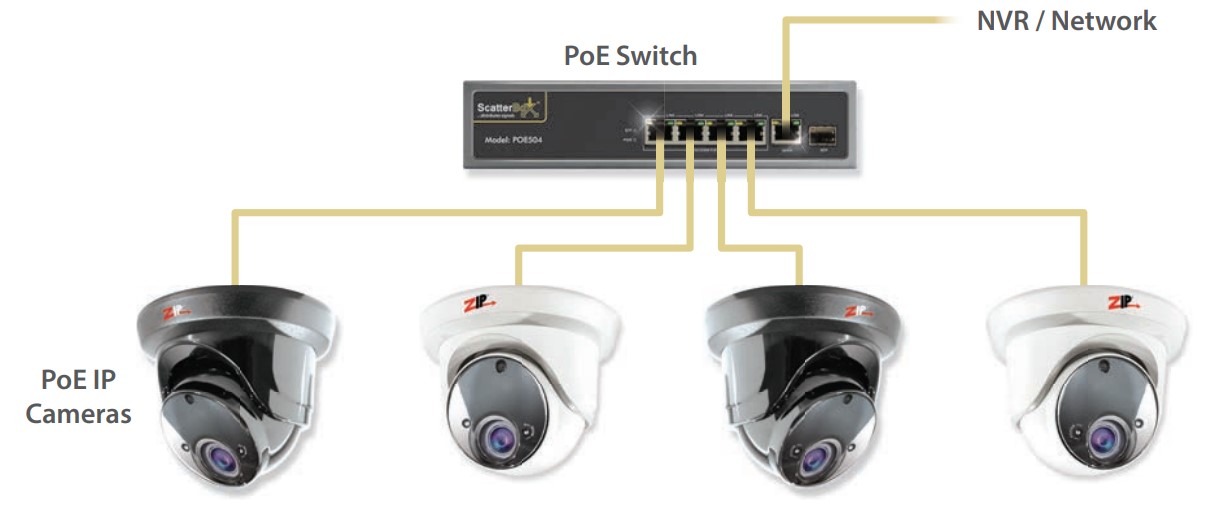
Option 2 Provide network infrastructure to PoE and non-PoE Devices, like computers, and other Network devices.. |
|
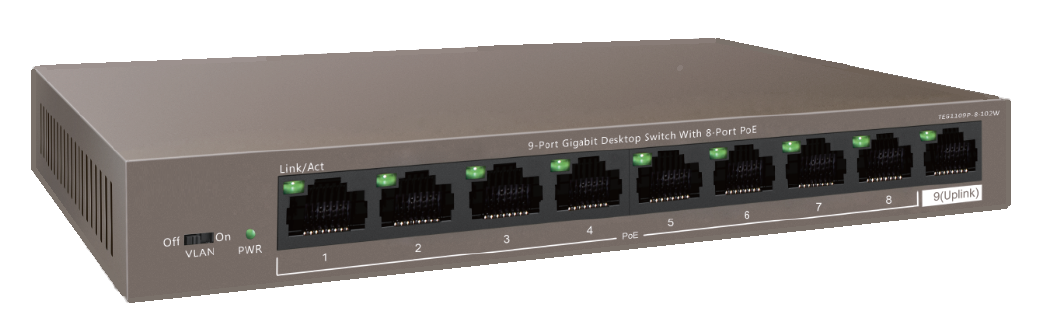
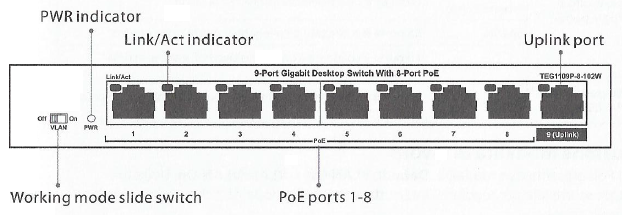
LED Status Indicators
LED |
Condition |
Status |
Power (PWR) |
|
The switch is receiving power |
|
The switch is not receiving power |
|
Link / Act (upper-left corner of each port) |
|
The port is connected |
|
No connection in the port |
|
|
The port is transmitting or receiving data |
|
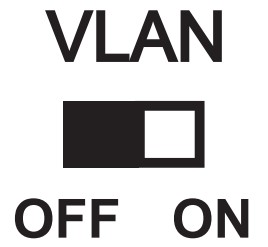
The VLAN switch allows separation between ports. As default VLAN is off, when VLAN is on ports on the different blocks won’t be able to see each other. Note that the UPLINK does see all ports so the separation is only between ports. |
Troubleshooting
Problem |
Possible Cause |
Solution |
No Power light on Switch |
No power to the device |
Check power to device from external source. Check that the power supply plugged into the switch. |
Loose connection |
Check that the power lead (IEC lead) is plugged in to the PSU and the PSU is plugged into the switch. |
|
Network light not flashing |
Poor quality cable or termination |
Check the Ethernet cabling to your device is of good quality and is terminated correctly. |
Connected devices not powering |
Poor quality cable or termination |
Check the Ethernet cabling to your device is of good quality and is terminated correctly |
Total power consumption exceeded |
Check the load devices are not above the total power consumption of the switch. |
|
Cable length |
Check the distance of Ethernet cable to your device. Ethernet cables have a 100m maximum length. |
|
Slow flashing LEDs, No network on load devices |
Faulty cable or device |
Turn the power off to the switch & unplug the load devices (Check Ethernet cabling to load devices). Leave the switch turned off for 10 seconds and then power the switch back up, plug each device back into switch individually to help troubleshoot the suspect cable. |
Downlinks (PoE |
8 x RJ45 |
Uplinks |
1 x RJ45 |
Standards & Protocols |
IEE802.3, IEE802.3u, IEE 802.3ab, IEE802.3x, IEE802.3af, IEE802.3at |
PoE |
30W (Max per port) |
Power |
92W (Whole device maximum) |
Bandwidth |
10Mbps / 100Mbp |
Use |
Internal Use Only |
Working Temperature |
0°C ~ 40°C |
Input Voltage |
AC 100-240V ~ 50/60Hz DC 51V/ 2.0A (Power Adaptor Provided) |
Dimensions |
(w)177.5 x (d)104x (h)26mm |