The best option for networking an IP camera is to assign the camera with a "static" IP address. There are multiple reasons why you would do this:
•The IP address is known and it will stay the same, making logging into the camera's web interface simpler and reliable.
•The IP address is known, therefore it is easier if the camera is to be added to a DVR or other device (or software).
•If the router is rebooted (or the DCHP server) it could assign a different IP address to the devices on the network, therefore making a static IP address preferred.
There are a few options to find and assign an IP address to your IP camera.
- Option A. Ask the on site IT department or network administrator for guidance on the IP address information to assign to the IP camera. Go to Make a note of the IP Camera address onwards.
- Option B. Find a free IP address yourself using the instructions below on a best endeavours basis if option A is unavailable. (See Option B on next page for instructions)
Option B - This section describes how to obtain a computers IP address, then using it find an available address to assign to a camera.
1. Identify the network adaptor
2. Identify if the PC has a static IP or automatically assigned address
3. Identify the PCs current address
4. Using CMD find an available address for the camera
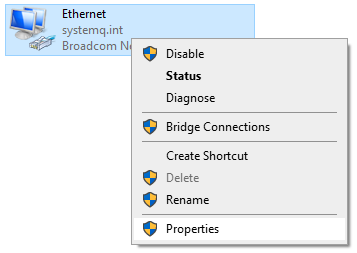
1. Identify the network adaptor the PC is currently using.
Close all programs currently in use.
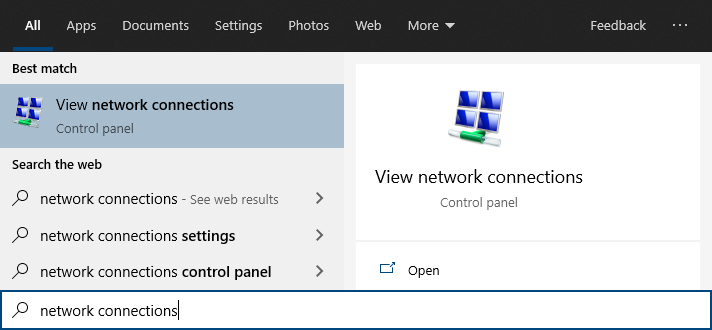
Using the PCs search tool type Network Connections.
•If the hardware connection (Ethernet) is already connected, watch the icon change to indicate "unplugged" by simply unplugging the cable.
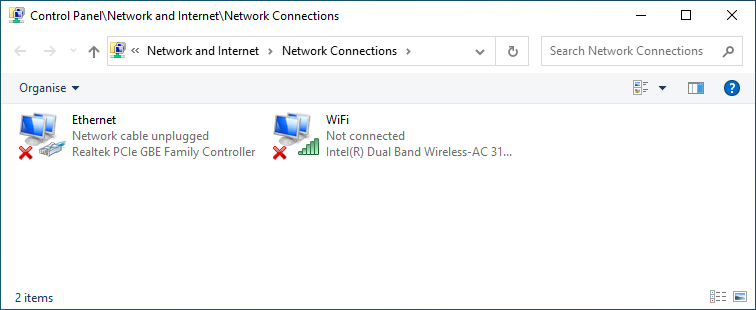
If you have multiple cabled adaptors, you can distinguish between them by connecting/ disconnecting the cable, the status should change.
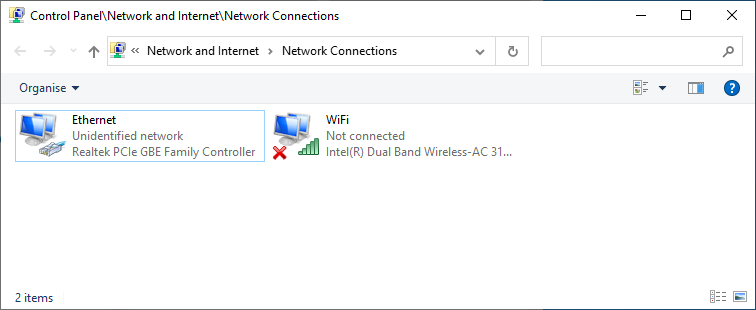
•And plug back in to determine if that adaptor is being used, below shows the adaptor Ethernet being used.
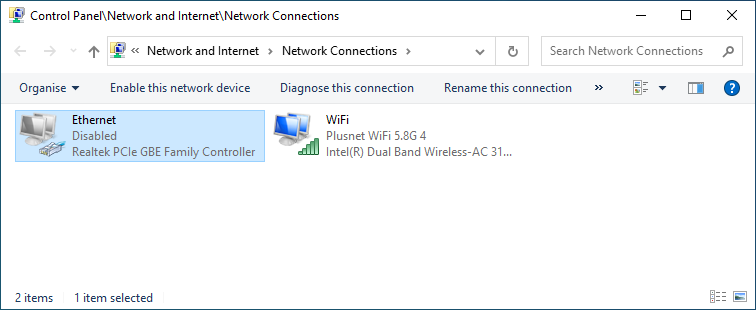
•If using WiFi then ensure all other adaptors are unplugged and disabled (right click, then select disable).
Make a note of the current "Connections:" type by name : _______________________
For example Ethernet
2. Identify if the PC is using a manually assigned static address or if the PC has obtained the address automatically using "DHCP".
Right-click on the connection type, select Properties.
Double click on Internet Protocol Version 4 (TCP/IPv4).
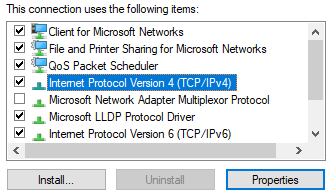
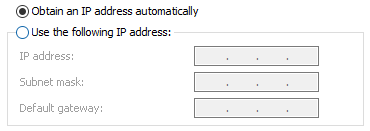
•If Obtain an IP address automatically is selected then proceed to step 3.
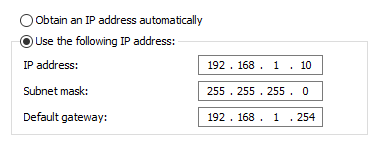
•If Use the following IP address is selected then proceed to step 4.
3. Find the PC's current IP address.
Using the PCs search tool type CMD then click enter to launch command prompt.
Type in IPCONFIG and click enter.
Look for the adaptor name identified in step 1, for example Ethernet adaptor. Scroll up or down if necessary
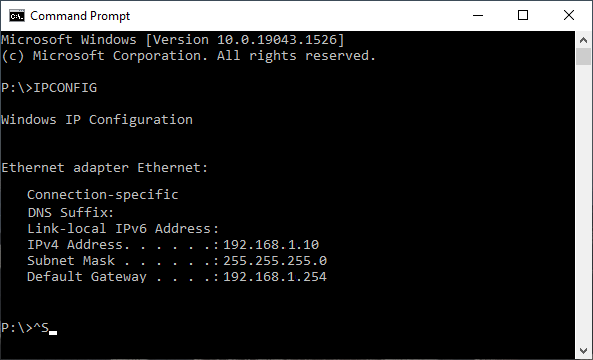
4. Make a note of this adaptors address settings here:
IP Address: |
______________________________
|
Subnet Mask: |
______________________________
|
Gateway: |
______________________________
|
5. Next try find an available IP address to assign to the camera using the ping command tool.
Use CMD (Command prompt) type in ping, space and then using the first three segments of the IP address of the PC, substituting the last segment with 250 at the end, then select enter.
For example: ping 192.168.1.250
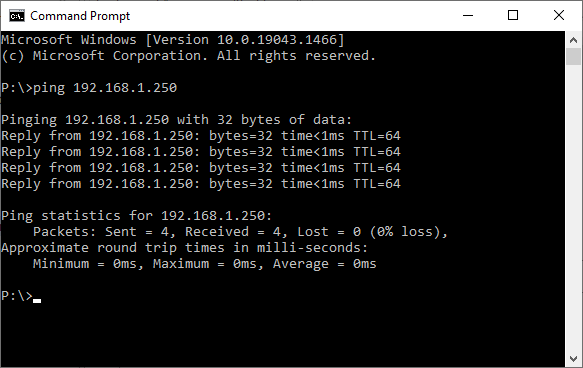
•If the reply is Reply from 192.168.1.250.... then the address is already taken on the network.
Simply search again but minus 1 from the last number.
For example: ping 192.168.1.249 until Destination host unreachable is the reply.
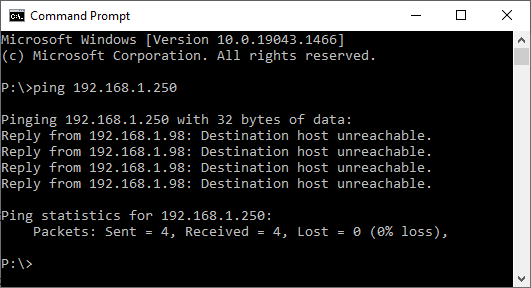
•If the message Destination host unreachable displays then this address is free to use for the IP camera.
Proceed to Make a note of the IP Camera address