Powering
Option 1 - Power from 12V DC (via the 2.1mm DC Socket), the current consumption is 300mA. The IPMIT304 is polarity sensitive so connections must be made correctly.
Option 2 - Power the camera using 48V PoE, in the RJ45 WAN/POE Socket
Note: The IPMIT304 will take approximately 3 mintues to boot up.
|
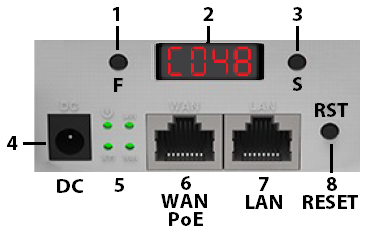
1 = Function Button |
2 = LED Display |
|
3 = Setting Button |
|
4 = 12V DC. 2.1mm DC Socket |
|
5 = Status LEDs |
|
6 = WAN - 10Mbps / 100Mbps 48 PoE network socket |
|
7 = LAN - 10Mbps / 100Mbps network socket |
|
8 = Reset/Pair Button |
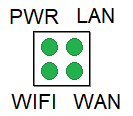
Status LEDs
|
PWR = Indicates on when power is connected to the IPmitter |
WIFI = Indicates when there is WiFi connection |
|
LAN / WAN = LAN and WAN light show network connection and flicker to indicate activity |